My current commission is a large executive desk made of black walnut and honey mesquite. The only guidance given by the client were rough dimensions. Other than that, he said, “Make me the desk you’d want to own if you were making it for yourself.” That caused me a month of existential anguish, as I searched my soul for what I’d want in a desk. I wish I was kidding about that, but this really turned into analysis paralysis. South Texas mesquite (aka Honey Mesquite) is an extremely cool-looking wood with a sort-of rustic feel, so that was my starting point.
Generally, mequite has crazy grain and figure, adding depth and visual interest. It also normally has myriad cracks, voids, and worm holes that typically get filled with black epoxy. So, my second thought was that an entire desk made of mesquite might be a little TOO crazy. So I chose walnut as a ‘secondary’ wood. This is a risky move, because the color tones of the wood are very different. Natural walnut is the color of hot chocolate; honey mesquite has rose, orange, and black tones. I’m not going to stain (read: tint or color) the wood; my goal is to get out of the way and let the wood do its thing.
Oh and another thing… this desk will have a secret compartment. Why? Because who wouldn’t want a secret compartment??? You need a place to stash your secret decoder ring and/or your plans of the Deathstar.
It is really tough to find wide pieces of mesquite. Normally, you don’t get boards wider than 6-8 inches or longer than 6 feet. I found a source near Austin that had a wide variety of gorgeous, book-matched pieces of mesquite.

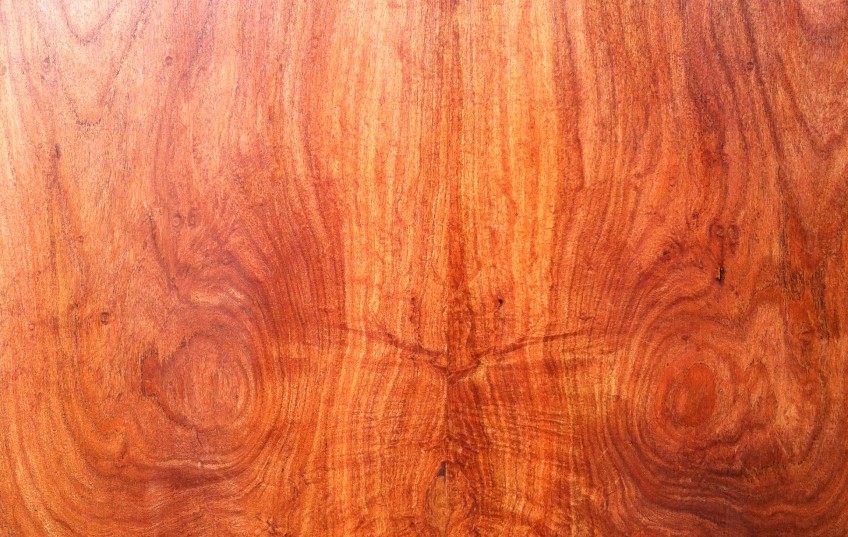
Here are the two book-matched boards I ultimately chose:

Two matching boards, moistened to evaluate grain patterns
Having purchased the mesquite, the next step was to get a load of black walnut:

walnut for the rest of the desk

Even more walnut for the desk
By this point, I have spent more on rough lumber than most people spend on a finished desk. And I haven’t made a single cut yet. This helps explain why fine furniture is expensive.
Next step, milling the mesquite boards and gluing them together.

Initial glue-up of mesquite desk-top
Kind-of a Rorschach Test, huh?

Mesquite after 20 passes on drum sander

Close-up of mesquite. It is extremely unusual to have boards free of defects. This is not a good or a bad thing, necessarily. Some people like the cracks and voids.
It is at this point that I finally know what I have and I can come up with a design on the computer. Normally, I design first, then make it. This time, the mesquite dictated the design:

Design of the project in Sketchup. It will look better than this, I promise.
Sketchup is really helpful to give me a sense of dimensions, but I’m awful at getting the wood grain to look right. As it is, this sketch looks like an explosion of pink on brown. Very jarring. But you’ve already seen the desk top, so you have a better sense of what that will actually look like.
The client wanted a desk in the neighborhood of 3″ X 6″. These two boards aren’t big enough to get that, so I am going to use walnut edging around the top. Because ‘end grain’ has really poor adhesion, I created a mechanical joint, called a sliding dovetail, to physically hold the walnut to the ends of the mesquite.

sliding dovetails cut into desk-top

close-up of the sliding dovetail

miters cut in walnut, end pieces fit into dovetails
One of the disadvantages of working with solid wood is that it expands and contracts seasonally with changes in humidity and temperature. If you don’t allow for that wood movement, you will often get cracking in the table top eventually. Normally, one would never miter solid wood onto a solid wood desk-top (by the way, the ‘miters’ here are two pieces of wood cut at 45 degree angles, together forming a right angle. I shouldn’t assume you know that). It’s just asking for trouble if the top expands or contracts. In this one case, though, it is ok to do this. Honey Mesquite happens to be the most dimensionally stable wood out there, on par with a manufactured wood like plywood or medium density fiberboard. So we’ll be fine.

walnut mitered and rough fit
I mortised peg holes through the end pieces and then pegged them with square mesquite pegs. This adds a little strength to the joinery but also is a nice aesthetic touch.

- Peg holes mortised through the dovetails


